Showing posts with label photography. Show all posts

Friday, 10 March 2017

A Vantage Point of Light and Flowers


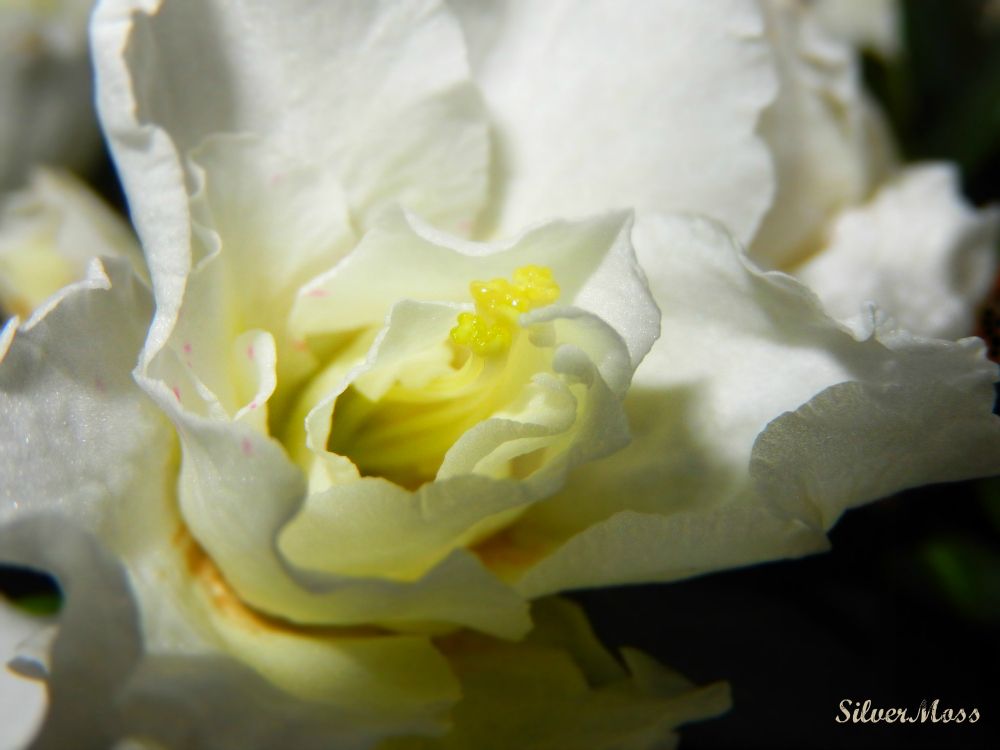
Vantage Point of White Azalea Flower - SilverMoss blog


At this time of year light is increasingly present in the lengthening days; it feels like a balm after the long nights of winter. A sunny morning, the lighter evenings both send more natural light into our lives. And light always matters to a jeweller, whether it's finding enough to see those tiny jump rings, keeping it dull enough to be able to solder in (I had to shut a gloriously sun-drenched morning out recently as I couldn't see the flame from my torch in the light), or having bright but diffused light in which to photograph the finished creation.

Light is also the name of an internet startup whom I've been in contact with. It's also the name of their camera, which is of course so logical (since cameras are all about light) that I'm surprised no one has thought of it before now.

Along with other bloggers, from a variety of fields and interests, I've been asked to share a Vantage Point that matters to me, somewhere I find inspiring and beautiful. I've chosen gardens, mine specifically. But, in general, any one that has a profusion of plants is enough to prompt me to reach for my camera.

The photograph I've shown here is of a flower from an azalea plant that was given as a gift. When I looked through my archives I realised that so many of the photos of plants are actually images of flowers, ways of getting up close to them so the colour, texture, and the very structure of them is the subject of the photo and nothing else. I guess this fascination with the form of the small is reflected in much of my jewellery too. My creations tend to be petite and delicate-looking rather than big and bold. In both plants and jewellery, it's the detail of the tiny that interests me.

I don't have a particularly advanced camera and tend to use very little equipment so natural light matters a lot to my outside photography. Whether it's sunlight filtered through leaves or a cloudy day, natural light isn't always easy to use but it is an endlessly interesting challenge. The azalea image was taken on a cloudy day which had bursts of bright winter sunshine; some of the other images I took are a little more muted than the one I eventually chose.

When I'm next able to indulge in a new camera I will look at the Light model. It's price is pretty high-end and it is, at present, only available to those who've already pre-ordered them, although you can sign up for more information. But with the amount of features, including the ability to work well in low light and a feature that lets you change your area of focus after the photograph has been taken , fitted into a device around the size of a smart phone it is closer to a DSLR than a point-and-shoot style of camera.

So, today, my Vantage Point is my garden. Tomorrow it could be the seaside or a woodland. Quite often it's my mini jewellery photography studio. And at others times it's a snap taken from a car window that just happens, when I look at it later, to have captured entirely the mood I was hoping it would, with colours, textures, atmosphere and, of course, light, all just perfect.

Do you have a Vantage Point, somewhere you return to either to challenge your photography or to allow you just to enjoy how it photographs for you? If so, then feel free to share.

~~~~

NB. Whilst I was contacted by Light and asked to take part in their Vantage Point project I am otherwise not connected with them and the links in my post are not affiliate links.

Monday, 25 February 2013

How to Photograph Handmade Jewellery - part 4

Here, at last, is part four of the How to Photograph Handmade Jewellery series. This post covers photographic styling, and where to find inspiration.

(If you fancy reading my previous posts on this topic then check out part one, part two, and part three through the links. You can also find them in my new Photography page, along with some other posts about photographing jewellery.)


Styling


Jewellery is made to be worn. So do give some thought to the idea of styling and photographing your jewellery on a model. A major advantage of using a model is that it gives the potential buyer a clear idea of how the jewellery will look when worn, and the way it hangs or lays. It’s also the easiest way to convey the actual size of a piece of jewellery. I guess if money is no object, the this is the way to style your jewellery...

I confess, I’ve not done this much and when I have attempted it, it’s never gone that well. The reason for this is probably that it’s better to find a friend to model for you while you take photos, than to try to be both model and photographer...

If you can't or would rather not use a model, then you can choose whether to lay your jewellery flat, to artfully arrange it over a prop, or to display it suspended, either on a visible hanger, or with some clear fishing-line or something like stretch magic - check out this tutorial if you fancy the invisible approach.

I tend to photograph my jewellery arranged over something in order to include some angles - I find laying it flat decreases how three dimensional it looks.

Styled with a prop...
and without


Whilst I’m increasingly experimenting with suspending jewellery for photographs, it can be quite time-consuming and frustrating to stop the dreaded swaying-in-the-slightest-breeze issue! Plus, getting things to dangle well when they’re hanging can be very awkward. Jewellery, when worn, tends to lean against something, either skin or clothing, and it very rarely lies static. Longer earrings often hang, to at least some extent, but the movement of an earring being worn, the sway as the wearer moves, is hard to capture in a photograph whilst also showing the earrings themselves clearly. I’m hoping that, with practice, my images of suspended earrings will improve.


Earrings suspended on wire...                                    and arranged flat on a prop.

Inspiration


Look at the internet and use it as a tool for inspiration. Trawl through Etsy, Folksy, Dawanda, and any other online retailer you can find that ideally sells work similar to yours. Look at online retailers that sell only one jeweller’s work, and then at markets that sell a wide variety. Spend a while on Pinterest (you could start here) and Flickr.

A few inspiring pins from one of my Pinterest boards


Create a folder of photos that attract you, try and figure out why they do so, and then see if you can integrate some of what they’re doing into your own photos. Drop someone a polite email and ask them how they achieved a particular effect. People are normally flattered by such contact. Use the web as a source of inspiration because it is also your marketplace.

Also, look in print catalogues and magazines, and see how professionals chose to show the jewellery. Be aware though that printed media is not the same as digital media but see if you can find ideas that you can translate into your own images.


The Digital Difference

People have a variety of settings on their computers, phones, tablets. Different operating systems, browsers, and screen resolutions all affect how an image looks. The image you yourself see on the screen in front of you will almost certainly not look the same on another machine because of the variety of potential settings available and the end result of any given combination. With the increase in devices to view the internet on, the chances that someone is seeing your photo the way you do, has dramatically decreased.

All you can do is take the best image you can, and display the colours and textures as honestly as possible, but it's important to be aware of the potential problems this issue raises. I had a customer who was surprised at the colour of a bead on a necklace bought from me. To me, the image I was using of the bead looked to replicate it very well. But the customer may have viewed the necklace on a machine with very different settings.

If at all possible, look at your images on more than one computer, tablet, laptop or phone. In fact, use all devices you have access to, and borrow others if you can. Whilst it is impossible to make an image render correctly on every device, with every potential variation of display, the more you understand about the common differences, the more you can allow for them when taking your photographs, and editing those images.

I hope this was helpful - do let me know!

~~~~

Part One on cameras and close-ups
Part Two on focus and lighting
Part Three on location, themes and backgrounds

Also, keep a look out for my forthcoming ebook covering in far more depth how to photograph handcrafted jewellery.

Tuesday, 12 February 2013

A photography aside

I am aware I still have not finished my mini series on photographing jewellery (parts one, two and three are here if you fancy a look so far). It will be done. But I guess I've had some issues with it, including a couple of pretty unfulfilling spells both before Christmas, and now again this last couple of weeks, when I've been creating new work that needs photographing.

It's been like any advances I had made crumbled away a little and, apart from blaming my camera (which, admittedly, is literally beginning to fall apart slightly, as some of the plastic casing has broken off), and the light (although a poor excuse when ambient light is bouncing off snow), I was getting a little frustrated.

This feeling was only compounded by the fact I got a rather swish camera tripod for Christmas. Now, I'm the first to admit my increasingly basic point and shoot camera looks a little silly on top of this so, for now, it's not something you'll see me out and about with, pretending I'm a photographer. And I discovered quite rapidly that a large tripod isn't really the thing for small, intricate shots of jewellery, especially when you're working in quite limited space, with not great light. The portability I had when using my camera in my (occasionally shaky) hand was something that was greatly lacking with a tall, slightly ungainly tripod.

Hmm.

Then I saw this thread on the Folksy forums the other week, and followed a link in it to this product. A week later I was perusing the aisles of a well-known budget supermarket chain and discovered a similar item on sale. I didn't buy it. It would be silly, extravagant. I already had a tripod. Ignore the fact I couldn't make it do the job I wanted it to.

But I went back to same supermarket last week, and they had a few mini tripods left. So I bought one.

It was smaller than I'd imagined it would be when I got it out of the packaging (which, surprisingly for plastic sealed, did not involve a sharp pair of scissors or any swearing at all), and when I set it up with my camera on, I feared it was not only too small, but the weight of the camera would destroy its balance.

But, lo, it worked. I could get the camera in just the place I wanted, and, wiggling the extremely wiggleable yet very tough and stiff legs, I could get the balance just right. The camera held in place and did not crash down on the jewellery below it.

Yippee.

Well, I hope so. I've not taken many shots yet, waiting for the grey days to pass, and perhaps a bit of sunlight emerge. Let's face it, I'd take just not-grey at the moment.

Of course, I can't show you a photo of the tripod in action, because I need my camera to take the photos of the tripod... but here it is, without the camera, anyway. Hopefully, my saviour. Or at least, a contributor towards photography salvation.


I'll let you know how it goes...

Saturday, 27 October 2012

How to Photograph Handmade Jewellery - part 3

Previously I've covered some of the basics of photographing jewellery, and how to light shots. This time I'm going to look at how location choice can save you work and time, and how creating themes for your jewellery can improve the look of the final images.


Location, location, location


A perfectly crafted piece of jewellery deserves to look its best, and so the setting up of photos is a crucial part of the process. Once you have found how to design your photos in a way that you’re happy with, then you’re well on your way to having a photography process or workflow which will enable you to whizz through jewellery photo sessions.

First, try and find a suitable place to take your photos. If you’re lucky enough to be able to leave your photography set-up in place then I envy you! Chances are you’ll need to have somewhere to store all the different elements you’ll need for each session, so try and keep them together and close to the place you’ll take your photos.

Of course, these are hints designed to make things a little easier, and most definitely not rules. If you fancy using a different spot each time you take photos then go right ahead. However, if you prefer to use one particular location then spend some time taking photos in a variety of places, for example on a well-lit table or, my personal favourite, on a window sill, until you find the best situation for you. Some people take photos outside and that can work well if you can rely on it not raining (not so tricky in the UK for much of the year ...).


Dream on a theme


Creating themes for your photographs is an ideal way of also creating continuity in your work, and a unified look for your shopfront and gallery images.

Theming your photos can be simple or complicated. I try to keep it simple by often positioning my jewellery on one or more large stones. (I have a small collection, created for this purpose.) Their rough surface contrasts with the shine of the silver, and I like the subtle colours that (I hope) don’t detract from the jewellery. My theme is the difference of unrefined natural stone with the refined silver and gemstones I use. This reflects some of the natural and organic aspects I try and integrate into my work.


I also use wood as a prop and find, again, the contrast between natural and polished surface a good contrast (see image further down page).

Some craftspeople create collections of jewellery and style themes for each collection. For example, I often use hearts in my work, and so I could, if I chose, photograph all my heart inspired jewellery on a red background, to indicate love and romance. I also create quite a few leaf designs, and so I could chose to always photograph these on the open pages of a vintage book on nature.

However, I chose not to do this for reasons of simplicity but it is a valid choice to make, and many people use the idea of theming their work to add interest to their photographs, and to create a brand identity. But that’s getting into the field of marketing and we’re just dealing with photography here.

Another alternative is to let your imagination run riot with each individual piece of jewellery you create, especially if you’re creating highly detailed and intricate works of art. If something has taken you many hours to make then don’t let it down at the last by failing to invest time and imagination into the presentation. A careful photographic study of a piece of jewellery can only enhance it.


Backgrounds


Often the simplest background is best, and the simplest choice for jewellery is a white background. This can be card or paper, or even cloth (although beware of tiny fabric threads on your work when taking close-up shots).

From personal experience I've found that black is a poor choice for a background colour. I experimented with this once and the high shine of the silver blurred against the black, and even seemed to bleed onto it. It was a disaster.

Silver photographed on a black background. Not good.

Silver photographed on stone. Rather better.


I sometimes see black backgrounds used in professional photo shoots for jewellery, but I think it takes far more equipment and know-how to make that type of high contrast photography work than I possess of either. My advice is, if you're looking to keep things simple, to steer clear of black backgrounds.


Following on from the principal of theming your photos, it can also be effective to be adventurous when choosing a background to place your work on. I use stones, as I’ve said, but some people use slate, leaves, or other natural items that contain texture. I've used pine cones on occasion, quite successfully, I felt.


Another popular trend, which I think works very well, is to use a book, either its cover or internal pages. Vintage books seem to work best, perhaps because of the texture they tend to have, and the contrast between that surface and the finish of the polished or highly-worked jewellery.

A jewellery box can be a wonderful prop, giving perhaps a vintage feel or a modern one. Make it clear in your description it’s not included in the price! And ensure it doesn’t detract from the jewellery by dominating the image. Chose large props with care.

Paying attention to the background is very important, whatever you decide to include in it. The background will always have an impact on the foreground. Either chose to make the background invisible (i.e. white), or decide on something bolder. But make the decision work for you by choosing carefully, and using with good lighting and deliberate focus on the jewellery itself.


Wood works (as a prop)


Sell your props!


Props don’t have to be purely aesthetic. Whilst it may be distracting and confusing to use other pieces of jewellery (although, for example, showing earrings that match a necklace, or vice versa, can be useful, especially if the other item is also for sale), as long as your prop enhances the overall image, then it can be interesting for the potential buyer to see, for example, the box that your jewellery will be packaged in. Including this as a prop to support your jewellery on, perhaps just in one of your photos, is a nice touch that inspires confidence in the overall buying experience.

Thanks for reading. Next time, I shall dwell a little longer on how to style jewellery, and will also look at where to find inspiration, and how to create a simple workflow to make photographing jewellery less time consuming.

~~~~

Do check out my other posts with ideas and hints on how to photograph jewellery -
Part One on cameras and close-ups
Part Two on focus and lighting
Part Four on styling and inspiration

Also, keep a look out for my forthcoming ebook covering in far more depth how to photograph handcrafted jewellery.

Wednesday, 17 October 2012

How to Photograph Handmade Jewellery - part 2

In part 1 I wrote about some of the basics of photography and how important it was to take a variety of types of photos, with a variety of angles. This time, I'm going to deal with why focus and lighting are key to good photographs.


Sharp as a...


Macro and close-ups are all very well, but it is important that the end image is in sharp focus. Light has its part to play in this (see below) but also important is eliminating camera shake, and a small tripod can be useful to steady the camera. Another idea is to use the timer on the camera to take the photos - that way the camera itself won’t be jogged by your hand as you press the shutter down. Again, explore what your camera can do and experiment to see how it can help your final images.

Use the autofocus feature that comes as standard on many digital cameras - by holding down the shutter button very slightly, with the middle square of the viewing screen aligned with what you want to photograph, the camera should automatically provide the best focus for that image.  Be aware that backgrounds of a similar colour as the subject, such as in the photo below, can make it harder for the autofocus feature to find what you want it to focus on...


Three silver ladies

If your camera has manual focus then experiment with that, alongside the instruction manual, to work out the right settings for your photographs.


Shine your light


Good lighting is essential to good photos. The camera doesn't see what we do and small and subtle deficiencies in light and its quality can translate into dark and dingy photographs. Ensuring the camera not only has enough light but also the right type of light can help eliminate this issue.

And what is the right type of light? The right type of light is both bright and diffused.


Diffusion 


Diffused light is vital, even if you are taking photos in the daylight. Harsh, unfiltered sunlight creates strong shadows, and the high contrast between light and shade can diminish how well detail is displayed in the photograph by creating both overly bright and deeply shadowed areas.

Taking this photo in bright sunlight has created heavy shadows on much of the silver ring. 


Ideal weather conditions are a bright, but cloudy day. In conditions of bright sunlight, try taking photos on a window sill which the sun doesn’t reach but where the light bounces off walls, so the ambient light levels are high. This will mean you won't get strong shadows but your work will be well lit.

If the shadows created are still too strong then consider using masking tape to fix tracing paper to a window to diffuse the light. The strong sunlight will scatter evenly and the shadows cast will be diminished. However, the power of the light will still be bright enough to enable a good photograph to be taken.


By diffusing some of that sunlight, the balance of shadow and light is far less stark


Another alternative is to create a light tent using net curtaining, or some other fine material, stretched over a simple frame. This tent or box effect ensures strong and harsh light is softened and diffused as it passes through the material before it hits the jewellery. The Digital Photography School, Strobist, and Instructables all provide helpful tutorials through these links on how to build light tents.


Brightness 


A downside of diffusing light is that it can have the adverse effect of making the light conditions too dull. If this is the case then find a piece of white cardboard and angle it to reflect light onto the jewellery. Another option is to wear a white top which will bounce light back as you snap!

Ideally, avoid using a flash when photographing jewellery. Nothing beats daylight and a flash can create areas of over-bright light in a jewellery photo that don’t represent your work at its best and can distort its true colour. However, if you only have evenings to shoot in then use a piece of white cardboard or tissue over the flash, to help diffuse the harsh light.

All this can seem hard work but getting the lighting bright but gentle enough can make all the difference between an image that looks dull and even blurry, and a photo that is sharp, clear, and well lit, with all the focus on what it should be - the jewellery.


Light is everything


The single most important element in photography is light. Without light we have no photographic images, and this is true for both film and digital photography. This is a simple rule and keeping it in mind whenever you're taking photos of jewellery and all crafts will improve the final result.


Exceptions to rules...


However, as an aside to all this, shadows can be used to add drama and texture to a photo. So do experiment with using shadow in some of your images if you think it will add interest to the jewellery. If you are using several photos to show an individual piece of work, then including an adventurous image amongst the more traditional views may be an interesting addition.

For example, this photograph below, taken in sunlight, has strong shadows and areas of brightness


but I do like the sparkle of sunlight on the silver, and it helps convey how light moves through the gemstones. I also feel it gives a sense of movement in the earrings, and I love the shadows of the earrings in the background.

But this more correctly lit shot also helps convey the shine of the gemstones, something that doesn't come through in the first photograph. 


So I would be happy using them both to showcase these particular earrings.

Next time, I'll focus on the importance of location choice, themes and backgrounds.

Thanks for reading and I hope the article has been helpful.

~~~~

Do check out my other posts with ideas and hints on how to photograph jewellery -
Part One on cameras and close-ups
Part Three on location, themes and backgrounds
Part Four on styling and inspiration


Also, keep a look out for my forthcoming ebook covering in far more depth how to photograph handcrafted jewellery.

Saturday, 6 October 2012

How to Photograph Handmade Jewellery - part 1

One of the biggest challenges involved in selling handmade goods online, especially for designer/makers, is photography. If a craftsperson cannot afford to employ a professional photographer (which is likely) and cannot find a photographer prepared to swap services (not impossible but certainly tricky), then they have to fall on their own resources and take their own photographs.

Like becoming skilful in a particular craft in the first place, gaining an understanding of photography can be a steep learning curve. Most people can use a point and click digital camera and take a decent photograph, but to take a detailed and quality image can be far harder. However, digital photography is the lifesaver here as you can take as many photos as you need until you have a collection that is good enough to publish. And a plethora of photo editing suites exist to refine and improve images.


It’s worth saying that I’m no photography expert but I do have a little experience, having taken shots of my own work for several years now, and (owing to a rather handy photography course I took a couple of years back) I do have a little insider knowledge when it comes to knowing my way around a camera. Having said that, while I’ve been reviewing some of my old photos as I’ve written these blog posts, it’s struck me how much I still have to learn, and that I need to apply what I do already know more keenly to my photographs. Hopefully the fruits of my labour will become evident in my next set of images.


Photographing Handmade Jewellery


First up, the importance of photos when selling online; the value of macro and close ups, along with that of the big picture; and how understanding jewellery will improve the photos you take.

A picture says a thousand words - explaining your jewellery without words 

Unlike in conventional shops, someone viewing your jewellery on the internet can’t examine how it looks from different angles, can’t pick it up and feel its weight, and can’t hold it up to themselves and see their reflection in a mirror. They’re dependent on the information you provide them with to make a decision whether or not to part with their money. The more information you offer the better, and providing that information in the form of good quality photographs is a wonderful form of shorthand that can convey the essence and quality of your work far more quickly than a wordy description can. Photographs, especially good quality ones, cut to the chase.


All you really need to take good jewellery photographs is... 

A camera with a macro button. Don’t become overwhelmed by the vast choice of cameras. Yes, a shiny new, top-of-the-range camera would be wonderful, thank you very much, but most modern digital cameras should possess the one essential you need to take decent quality jewellery photographs - a macro button. The button normally has a small flower icon on it, and when you press it the camera focuses far closer than it does for the average family or landscape shot. This means you can take sharp images of the detail on your jewellery.

My rather old and not-very-expensive (okay, cheap) camera has a neat trick which means if you press the macro button twice you get to super-macro, which focuses even closer and allows an extreme close-up image. Check your camera, and instruction booklet if you have one (it may well be in PDF form, or even only available online), to see if you have super-macro. If you do have it, you won’t regret searching it out, as it’s a super-handy facility.


Photo of rings taken on a macro setting
The same rings, photographed on super-macro


The big picture

Whilst macro close-ups are invaluable for displaying detail in jewellery it is also important that you pull back in some shots, to allow your item of jewellery to be fully shown. Provide a variety of images to give the viewer as much information and detail as possible. I aim to include one or two overall images of each piece along with several close-ups on macro and super-macro, using different angles to add interest and hopefully show the jewellery in interesting ways.

A picture of the whole piece of jewellery...

...a close-up of the same item of jewellery


Variety is the spice of life - angles and approaches

Jewellery is three dimensional but photographs aren’t. With careful use of angles and perspective however, you will be able to make your photos dynamic and give your jewellery a real feeling of movement and vigour. Experiment with taking photos from overheard, or low-down, close to the jewellery and from further away, as well as from the side and straight on. I’ve found moving the camera around to more extreme angles can increase how striking the jewellery looks, which can attract the eye of the casual browser. Using such images in amongst more traditional shots allows your jewellery to be seen clearly but also to create interest and excitement.

Hopefully still recognisable as a bangle...


In the next post on this topic I'll cover lighting and how it can be the most important element in your photo, alongside the jewellery.

Thanks for reading and please feel free to leave any comments, queries, or corrections on what I've written - I'd love to also increase my own knowledge into this fascinating and wide-reaching topic.

~~~~

Do check out my other posts with ideas and hints on how to photograph jewellery -
Part Two on focus and lighting
Part Three on location, themes and backgrounds
Part Four on styling and inspiration


Also, keep a look out for my forthcoming ebook covering in far more depth how to photograph handcrafted jewellery.

Friday, 19 December 2008

Folksy result!

Things have gone well on Folksy. I've sold far more than I expected to in far shorter a space of time. Well, let's face it, I did suspect I might not sell anything at all. But, so far (and probably all that will be sold before next year. Assuming anything sells next year . . . ) I've sold five items to four buyers. Yes, someone even wanted two pieces of jewellery which left me feeling just ever so slightly chuffed!

So, if nothing else, I've covered the cost of listing although probably not the hours it's taken me, as I've found it very consuming of time; taking photos, getting them the right size (after finding out how to get them the right size), working out just how the listing works, then going back and doing it properly, then making right what went wrong and I didn't notice had gone wrong etc. But, that aside, it is a nice buzz when someone actually likes your work enough to part with money for it, and even nicer when you find out they really like it when they receive it too! I'm starting to wonder if I'll ever get over jewellery-related low self-esteem . . .

I've been experimenting with backgrounds and props with my photography, making the most of the sun when it came out on Saturday after spending what felt like a brief eternity sulking behind grey clouds. I'm quite pleased with the results and that I got out of my 'comfort zone' and tried something new. It may not seem dramatic but different coloured pebbles seem to have made a big difference to the way the silver looks, even if it's just to me!


I also used the elegant hand/arm prop:


I messed around with a black background as well but it dulled the clarity of the silver and meant the texture of it was lost so unless I learn a little more about cameras and perhaps have a better quality one at my disposal, I might well steer clear of that idea for now. The first photo is, obviously, on a black background. The second is, again obviously, not.


See what I mean?


But this (and Christmas shopping, wrapping presents, writing cards - all of which seems to have taken at least twice as long as it ever has before this year) has meant that actually making the jewellery, you know, taking bits of silver and then fashioning attractive items from them, has been sitting on the back burner, feeling a bit neglected and wondering if I've forgotten it.

I've not. I've got plans for the new year, have been looking through notes, letting ideas formulate and percolate . . . although I must try and remember that just because I've made something once doesn't mean I can't make it again. It'll never be exactly the same, handmade jewellery - made by me anyway! - just doesn't work like that, so I know when I find a design I like I can revisit it, even develop and adapt it. But I always seem to find the urge to try something new just a little too tempting . . . Perhaps a New Year's resolution is in order.